


Dream of toned hips, but don't know how to achieve the desired result? The answer is simple: you need to work on the beauty of your body. There are many exercises that will help improve the figure, including the hips. If it is this part of the – Your number one goal, you can try yoga poses for toned thighs that estet-portal.com has collected in this article.
However, don't forget that proper nutrition will help enhance the fat-burning effect of any exercise and maintain the results for a long time.
Best yoga poses for toned hips
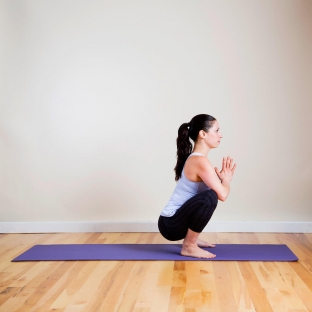
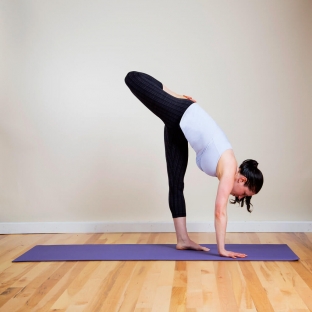
Pose #1
- stand with your legs apart slightly wider than hip distance apart; now start lowering your hips to the floor, after bending your knees;
- put your palms together at the level of the center of the chest; push your elbows hard on your knees to spread your hips wider;
- transfer weight to heels, raising head up;
- after five complete respiratory cycles (hereinafter – DC) return to the PI.
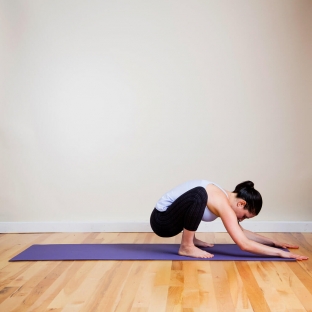
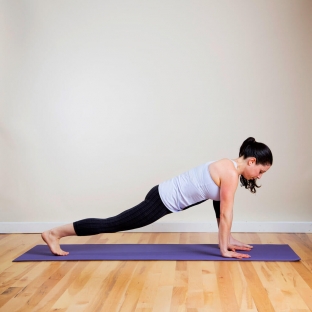
Pose #2
- put your hands on the floor; move them away from you as you lower your stomach to the floor;
- Relax your head and stay in the position shown in the picture for five DCs.
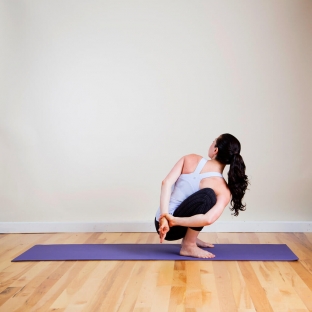
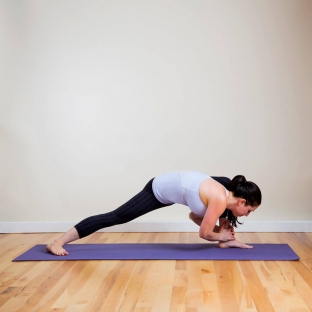
Pose #3
- take your hands to your feet; lower your right shoulder so that it is in front of your right knee;
- "wrap around" knee under the armpit, guiding the forearm behind the lower back; palm should look away from you;
- Turn your left arm towards the ceiling, bend at the elbow and bring it behind your lower back;
- if you can, touch the fingers of both hands, grab your left wrist with your right hand (the palm of your left hand "looks" away from your back);
- After five DCs, return to IP.
Pose #4
- clasping your right knee with your hands, tilt your body forward as far as you can; if you find it difficult, lower your hands to the floor, keeping your leg bent;
- Complete the exercise in five DCs.
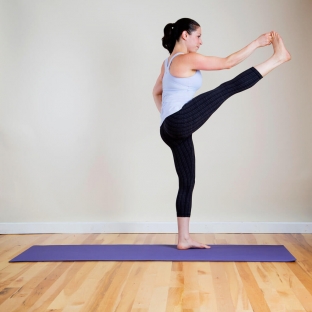
Pose #5
- leaning on the left foot, raise the bent right leg, and lower the arms;
- grasp the big toe of the right foot with three fingers: thumb, index and middle; put your left hand on your left thigh;
- left leg remains straight; straighten your right leg in front of you; After five DCs, return to IP.
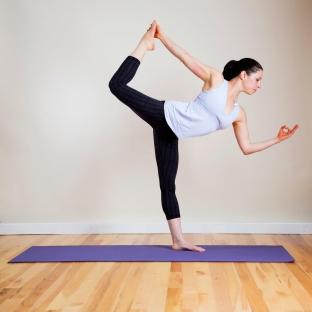
- bend your right leg at the knee;
- tilting your upper body forward and holding your bent leg behind the arch of your foot, move it back;
- pull in the belly;
- wait five DCs and return to the IP.
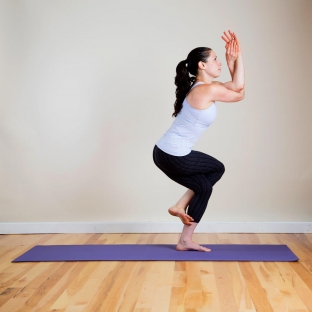
- release foot, lift upper body and move right knee forward;
- cross your right leg over your left so that it wraps around your thigh and your toes are behind your shin (see picture);
- cross your arms so that your left elbow is over your right and join your palms;
- after five breaths, return to the PI.
- holding the arms and legs in the position from exercise 7, bend your knees and lower your upper body down, touching your right knee with your right elbow;
- hold for five DCs.

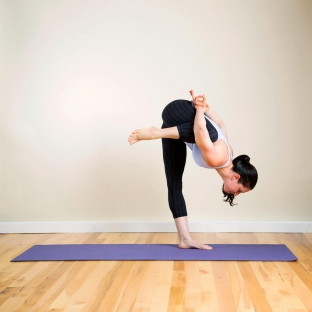
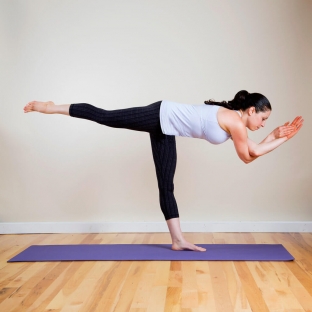
- arms crossed as in the previous two poses;
- take your left leg back;
- keep your upper body parallel to the floor;
- stretch your arms in front of you;
- squeezing the abdominal muscles, wait 5 DC and return to the PI.
- Bending the right leg at the knee, lower the right hand to the floor and hold the toes of the right foot with the left hand;
- raise your knee as high as possible and hold the position for five DCs.
- take your right leg back;
- bend your left leg at the knee;
- put your hands on the floor;
- hold the body in the position shown in the figure for five breaths.
- lower your torso and place your left hand under your left leg bent at the knee;
- interlace your hands in front of your left ankle;
- weight on your feet;
- breathe deeply and stay in this tucked thighs pose for five DCs.
- stand so that one leg is in front and the other – slightly behind;
- lower the knee of the leg behind you to the floor;
- raise the foot of the bent leg to the thigh, holding it with your hand;
- put the forearm of the free hand on the thigh in front of the standing leg;
- count five DCs.

Add a comment